Hi All,
In this case I'm providing five images, including
the original left and right images. If you want to work the images into a
phantogram yourself, follow the directions below. If not, just pop on your
3-D glasses and look at the finished ToyMotorcycles.jpg image. I invite you to print the finished phantogram so you can see
it properly, back from an angle.
I hope to demonstrate two things: 1) going from the
original left and right pair of images to the finished image; and 2) how
the position of the reference grid effects the shot. To fully
illustrate #2, I probably should have a second reference frame at ground level
and work the shot that way as well.
I'm currently doing a weekely email of
images and information. If you wish to be added to the
list, let me know. If you have any questions about the descriptions below,
by all means email me.
Barry Rothstein
Making the Phantogram
The image files suffixed by _OL and _OR are the
original left and right images. You'll need a relatively recent
version of Photoshop (any CS version, old versions 7 and higher).
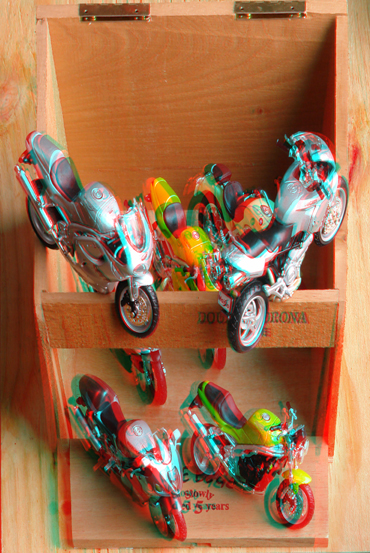
Often for a phantogram the reference grid is at the bottom or ground level, but
in this case it (the picture frame) has been placed at approximately the same
height as that as the top of the cigar box that holds the toy motorcycles.
As such in the finished phantogram the top of that box should be fairly flush
with the surface of the image, the motorcycles in the bottom of the box should
be sunken well below and those atop the box should rise above the
image.
Using the crop tool select an area including the
corners of the picture frame. Once an area
is selected a checkbox with the word
Perspective should appear. Be sure the box is checked. Use
<CTRL><+> and <CTRL><-> to zoom in and out, and
carefully place the corners of the crop to the corners of the picture
frame. Hit <ENTER>, then resize (Image Size) to 18" x 24" at 36 dpi
(be sure the Constrain Proportions checkbox is not checked). Do this with
both images. The images suffixed _XL and _XR are at this stage.
Given these two you can view them as parallel a parallel pair, crossview pair,
or combine them into an anaglyph. The final image would be cropped
with the Rectangular Marquee or Crop tool to exclude the picture frame and other
unwanted elements.
 (293K)
 (265K)
 (254K)
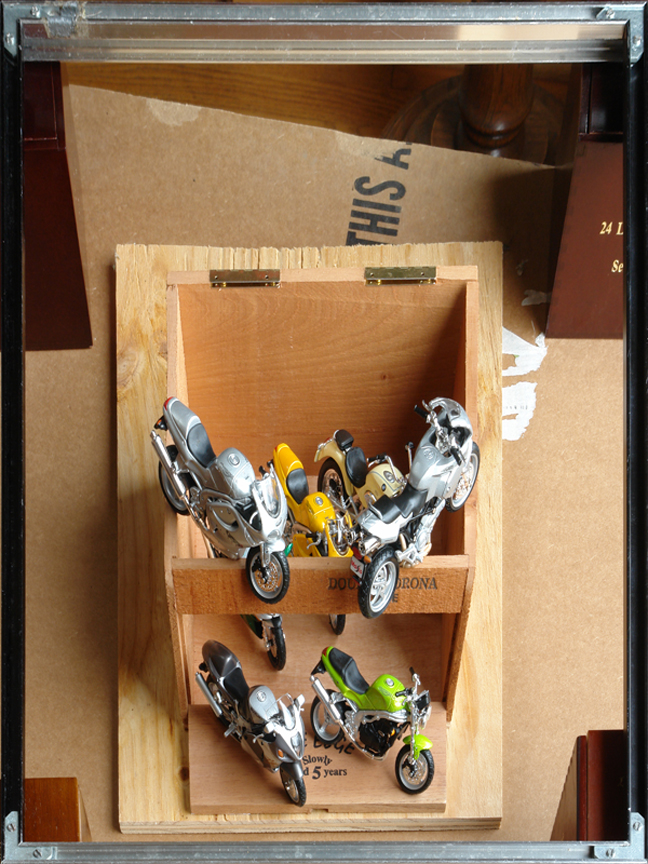 (522K)
 (551K)